🙋♂️ Tech Support
We recently updated this page to accommodate the necessity of deploying a gh-pages website from svelte.
Table of contents
Introduction
Labs and projects in DSC 106 are mostly coding assignments, so it’s important to make sure that your computing environment is set up properly. You will need to use DataHub for the first lab. You will need Git, VSCode, and Node to complete all other labs and projects.
Git
All of our course materials, including your assignments, are hosted on GitHub in this Git repository. This means that you’ll need to download and use Git to work with the course materials.
Git is a version control system. In short, it is used to keep track of the history of a project. With Git, you can go back in time to any previous version of your project, or even work on two different versions (or "branches") in parallel and "merge" them together at some point in the future. We'll stick to using the basic features of Git in DSC 106.
There are Git GUIs, and you can use them for this class. You can also use the command-line version of Git. To get started, you'll need to "clone" the course repository. The command to do this is:
git clone https://github.com/dsc-courses/dsc106-sp24
This will copy the repository to a directory on your computer. To bring in the latest version of the repository, run git pull in your local repository. This will not overwrite your work. In fact, Git is designed to make it very difficult to lose work (although it's still possible!).
Merge Conflicts
You might face issues when using git pull regarding merge issues and branches. This is caused by files being updated on your side while we are also changing the Git repository by pushing new assignments on our side. Here are some steps you can follow to resolve it:
NOTE: Whenever working with GitHub pulls, merges, etc., it’s a good idea to save your important work locally so that if you accidentally overwrite your files you still have the work saved. Save your work locally before following the steps below.
git statusshows the current state of your Git working directory and staging area. It’s a good sanity check to start with. You will probably see your project and lab files that you have worked on.git add .will add all your files to be ready to commit.git commit -m "some message of your choice"will commit the files, with some description in the quotations. This can be whatever you want, it won’t matter.
At this stage, if you git pull, it should work. You should double-check that you have new files, as well as that your old files are unchanged. If they are changed then you should be able to just copy-paste from your local backup. If this does not work then you may have merge conflicts, follow the next steps:
git checkout --theirs [FILENAME]will tell git that whenever a conflict occurs in[FILENAME]to keep your version. Run this for each file with a conflict.git add [FILENAME]to mark each file with a conflict as resolved.git rebase --continueorgit merge, depending on the setup.
VS Code
To create, write, and edit our code, we are going to use a code editor. For this class, we are going to provide support for VS Code. If you want to use another code editor, feel free to do so, but keep in mind that we may not be able to recreate the problems that you may run into. You may download VS Code from here.
In order to make our lives easier when we develop websites, we are going to use some VS Code extensions. Up to lab 6, it is only necessary to install the following two extensions. Come back when you need to work on lab 6; more information (related to Node installation) will be updated.
Prettier
This is an extension that will help us keep our code clean and tidy. Click “Install” on the webpage. It will redirect to your VSCode; then, click “Install” again to install the extension.
Live Preview
This will host a local server in our workspace for us to preview our web pages on. Click “Install” on the webpage. It will redirect to your VSCode; then, click “Install” again to install the extension.
Svelte for VS Code
Starting Lab4, you are going to use Svelte. This will help you with svelte components. Click “Install” on the webpage. It will redirect to your VSCode; then, click “Install” again to install the extension.
Node.js and npm
Again, for Lab 4, we are going to need node.js and npm. Node.js is an open-source, cross-platform, JavaScript runtime environment that executes JavaScript code outside of a web browser. NPM – or “Node Package Manager” – is the default package manager for JavaScript’s runtime Node.js. You may find detailed instructions to download and install them here.
To check the Node version, open a command prompt and type:
node --version
To check the npm version, type in:
npm --version
If everything is installed correctly, you should see the version number information.
Generate static site using svelte SSG
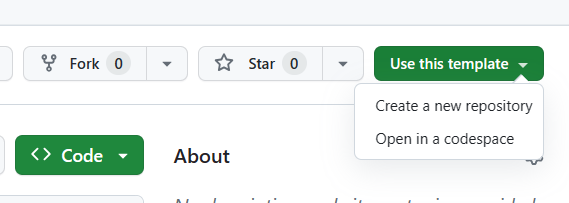
To assist you in creating a static webpage for GitHub Pages using Svelte, we have developed a template for you: ShaokangJiang/svelte-template (github.com).
Please follow the link provided, and initiate the creation of a new repository.
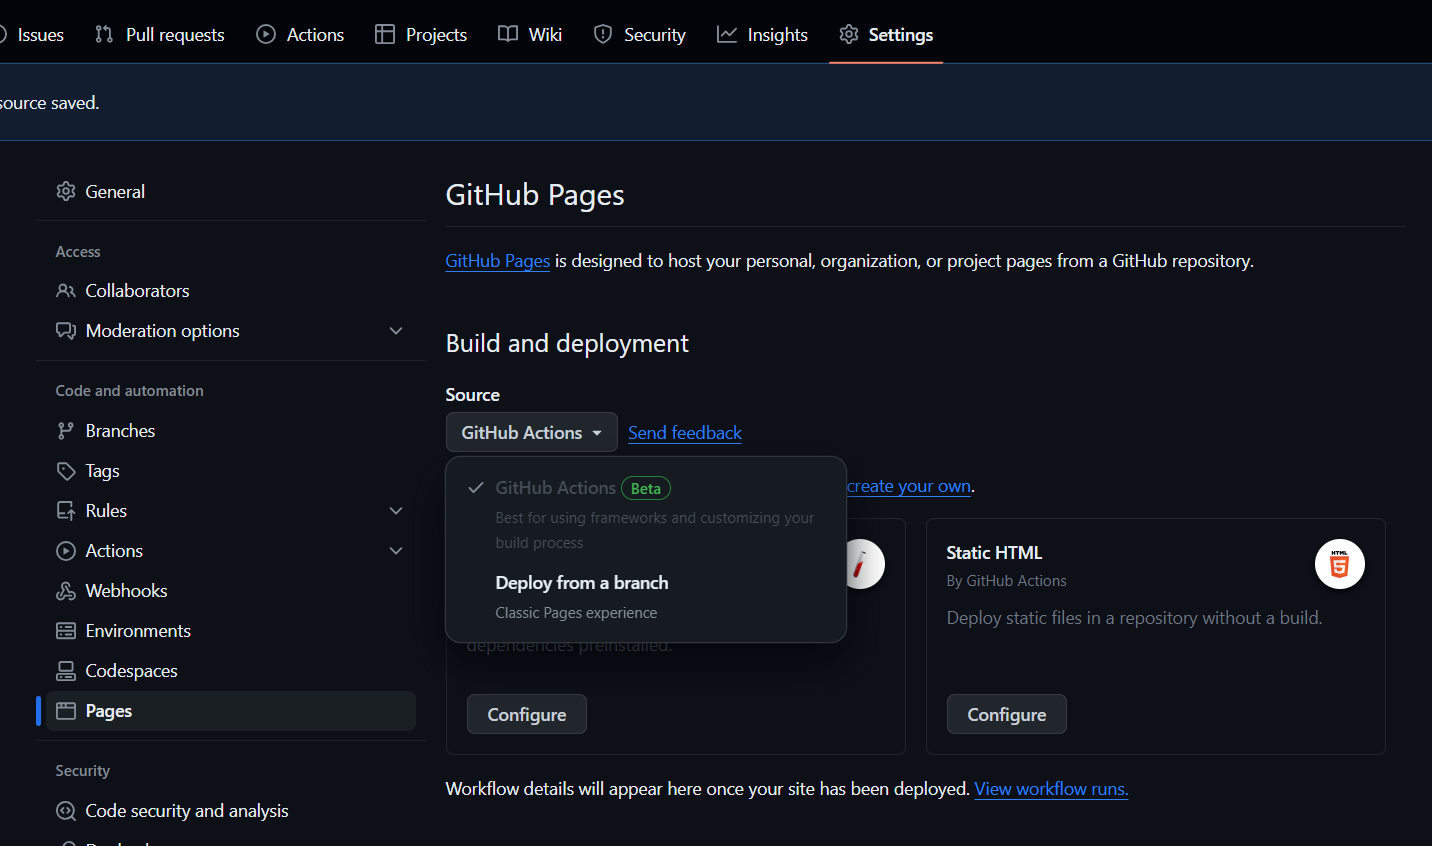
After GitHub completes the cloning process, navigate to the settings page. On the left panel, under the “Pages” tab, locate the “Source” section and select “GitHub Actions” as the source.
Clone this repository and proceed with your work. Upon completion, commit and push your changes. The corresponding GitHub Actions will then execute, building a static website hosted at https://your-username.github.io/your-repo-name for you.
Migrate from your project
If you have started on the project and want to switch to using this template, you can copy your src folder, go to the local clone of your version of this template, then paste it. When it says the file exists, simply click replace, and you can continue working on your version of this template.
Any question?
The easiest and fastest way to reach our support for technical matters is by posting on edstem. You may also go to OHs.